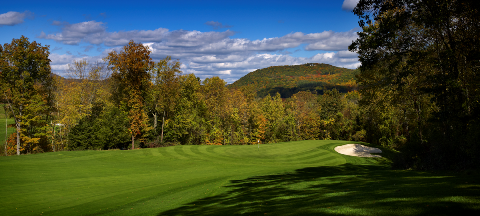
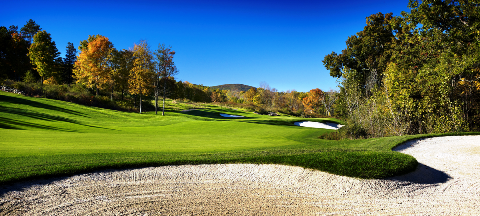
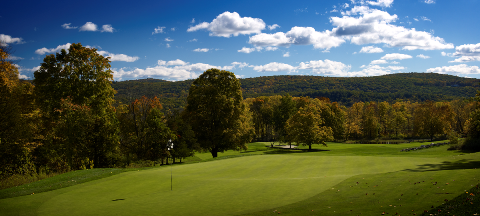
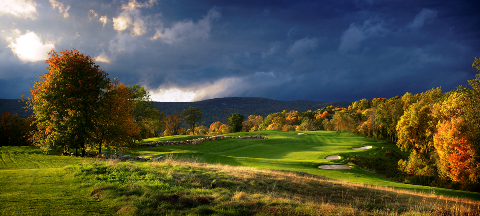
Course Tour
◊ Holes 1-3 / Holes 4-6 / Holes 7-9 / Holes 10-12 / Holes 13-15 / Holes 16-18 ◊
↓ Hover over a hole to see drone flyover footage…
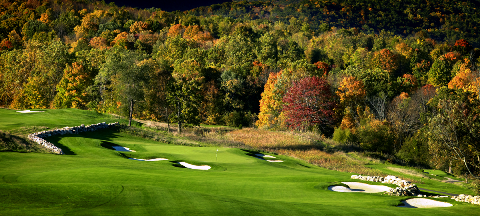
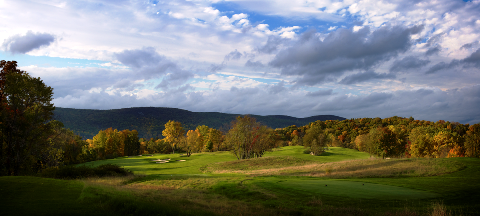
Hole 1
Par: 5
Handicap: 2
534 ♦ 516 ♦ 492 ♦ 464
The round begins at the top of the property from an elevation of just over 800 feet. The opening hole is a long meandering, gradually sloping down-hill Par 5. The design is intended to provide the player with a welcoming opening hole.
Hole 1
Click below to view flyover…

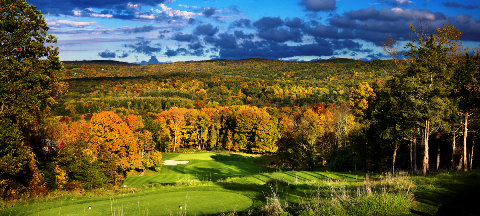
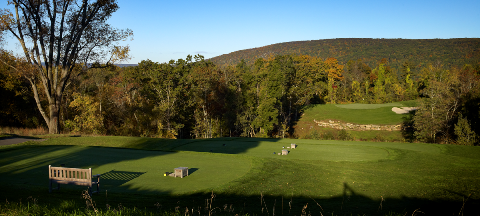
Hole 2
Par: 4
Handicap: 12
322 ♦ 300 ♦ 294 ♦ 249
In addition to providing a “breath taking” view from the tee, the player must concentrate and decide how bold they are on this down-hill “risk-reward” Par 4.
Hole 2
Click below to view flyover…

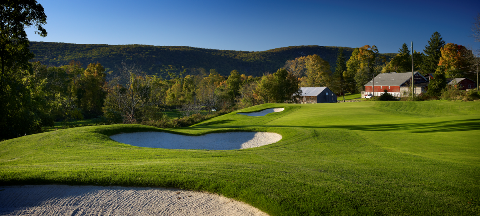
Hole 3
Par: 4
Handicap: 4
409 ♦ 393 ♦ 371 ♦ 338
The first of the holes in the “valley,” this mid-length par four has a wide and inviting fairway. Once on the fairway the player must hit an accurate second shot to a two tiered green.
Hole 3
Click below to view flyover…

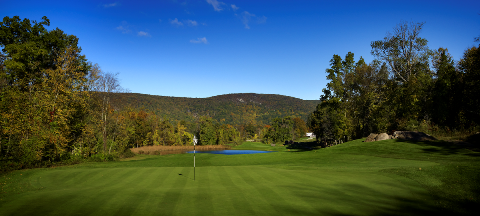
Hole 4
Par: 3
Handicap: 18
162 ♦ 156 ♦ 138 ♦ 112
The “shortish” par 3 has a long narrowing green, which will force the player to use a variety of clubs depending on where the hole is located.
Hole 4
Click below to view flyover…

Hole 5
Par: 4
Handicap: 14
432 ♦ 404 ♦ 387 ♦ 346
This par 4 measures 432 yards from the championship tees, but offers a variety of distances for all players. The drive needs to carry a slight rise, before the downhill second shot can be played to this undulating green.
Hole 5
Click below to view flyover…

Hole 6
Par: 5
Handicap: 6
607 ♦ 525 ♦ 515 ♦ 486
This long par five plays downhill on all three shots. The narrow landing area off the tee must first be dealt with. The “lay-up” shot must be properly placed to a landing area that slopes away from the player. The third must be hit with the highest level of accuracy to a narrow well bunkered green.
Hole 6
Click below to view flyover…


Hole 7
Par: 3
Handicap: 16
196 ♦ 180 ♦ 144 ♦ 110
This mid length up-hill par 3 features a “false front” and a two tiered green. The player must hit a well struck golf shot to avoid the golf ball coming back down the front of the green.
Hole 7
Click below to view flyover…

Hole 8
Par: 4
Handicap: 8
358 ♦ 334 ♦ 296 ♦ 263
This relatively short uphill par four is well bunkered down the left and features a two-tiered green that will need to be successfully navigated by the second shot or three putts are a possibility.
Hole 8
Click below to view flyover…

Hole 9
Par: 4
Handicap: 10
401 ♦ 375 ♦ 370 ♦ 334
The front nine finishes with a strong dogleg right par four. This classic “cape hole” will challenge the player to play conservative to the left or take a more aggressive line to the right. If the player can successfully play to the right he will encounter a much shorter second shot to this up-hill well contoured green.
Hole 9
Click below to view flyover…


Hole 10
Par: 5
Handicap: 1
539 ♦ 521 ♦ 495 ♦ 450
The 10th hole turns back, slightly up hill, towards the clubhouse. The opening hole of the back nine is usually a three shot hole, but the longer more aggressive player may wish to “take a shot” at this well-bunkered, narrow, three tiered green.
Hole 10
Click below to view flyover…

Hole 11
Par: 4
Handicap: 5
495 ♦ 457 ♦ 397 ♦ 372
The 11th hole turns back to face a spectacular backdrop of the Litchfield Hills. The drive slopes downhill and right to left. Finding the fairway is a must if the player wishes to have the opportunity to hit his second shot on the green.
Hole 11
Click below to view flyover…

Hole 12
Par: 3
Handicap: 11
204 ♦ 183 ♦ 165 ♦ 145
The 12th hole presents the player with another challenge. The green is wide and undulating. The contours will challenge even the best of putters.
Hole 12
Click below to view flyover…

Hole 13
Par: 4
Handicap: 13
371 ♦ 348 ♦ 327 ♦ 280
A relatively short downhill par 4 with the magnificent backdrop of the Housatonic River Ridge. A short iron is usually the second shot to this narrow and undulating green.
Hole 13
Click below to view flyover…

Hole 14
Par: 4
Handicap: 15
371 ♦ 345 ♦ 308 ♦ 274
This “classic” short par four requires the player to think his way through the hole. A well placed tee shot up the left side will give the player the right angle into this well bunkered green.
Hole 14
Click below to view flyover…

Hole 15
Par: 4
Handicap: 3
452 ♦ 429 ♦ 422 ♦ 262
This strong par four begins with an uphill tee shot across wetlands. The player will encounter an uphill second shot to a narrow, well bunkered green. A par on the 15th is a very good score.
Hole 15
Click below to view flyover…

Hole 16
Par: 3
Handicap: 17
201 ♦ 183 ♦ 165 ♦ 127
The 16th green is an inviting target some 50 feet below the tee boxes. A mid-iron will need to properly be placed on this well contoured green.
Hole 16
Click below to view flyover…

Hole 17
Par: 4
Handicap: 9
443 ♦ 411 ♦ 395 ♦ 304
The 17th continues the strong finishing quartet through the hollow. The player must drive his ball into a fairway that “bottlenecks” to ensure the right angle into this shallow green.
Hole 17
Click below to view flyover…


Hole 18
Par: 5
Handicap: 5
495 ♦ 472 ♦ 450 ♦ 375
The 18th is a reachable uphill par 5 with a very narrow and well-bunkered driving area. The second or third shot to a 10,000 foot green must be well positioned or the player may be faced with a 120 foot putt. A finishing birdie or eagle will provide any member or guest with a fond memory of their round at Bull’s Bridge.
Hole 18
Click below to view flyover…

If you can not see the video, please refresh the page.
If you can not see the video, please refresh the page.
If you can not see the video, please refresh the page.
If you can not see the video, please refresh the page.
If you can not see the video, please refresh the page.
If you can not see the video, please refresh the page.
If you can not see the video, please refresh the page.
If you can not see the video, please refresh the page.
If you can not see the video, please refresh the page.
If you can not see the video, please refresh the page.
If you can not see the video, please refresh the page.
If you can not see the video, please refresh the page.
If you can not see the video, please refresh the page.
If you can not see the video, please refresh the page.
If you can not see the video, please refresh the page.
If you can not see the video, please refresh the page.
If you can not see the video, please refresh the page.
If you can not see the video, please refresh the page.